


This article is about manually configuring a front-end project from scratch, which will involve Webpack, React, Babel, TypeScript, Ant Design, Sass, Eslint, Prettier.
This article is based on the attitude of “don’t seek to understand”, mainly over the use of each module, suitable for following step by step from zero.
The front-end engineering project is built in the node.js environment, after which you need to install various npm packages, so first the computer must have been configured with a node environment.
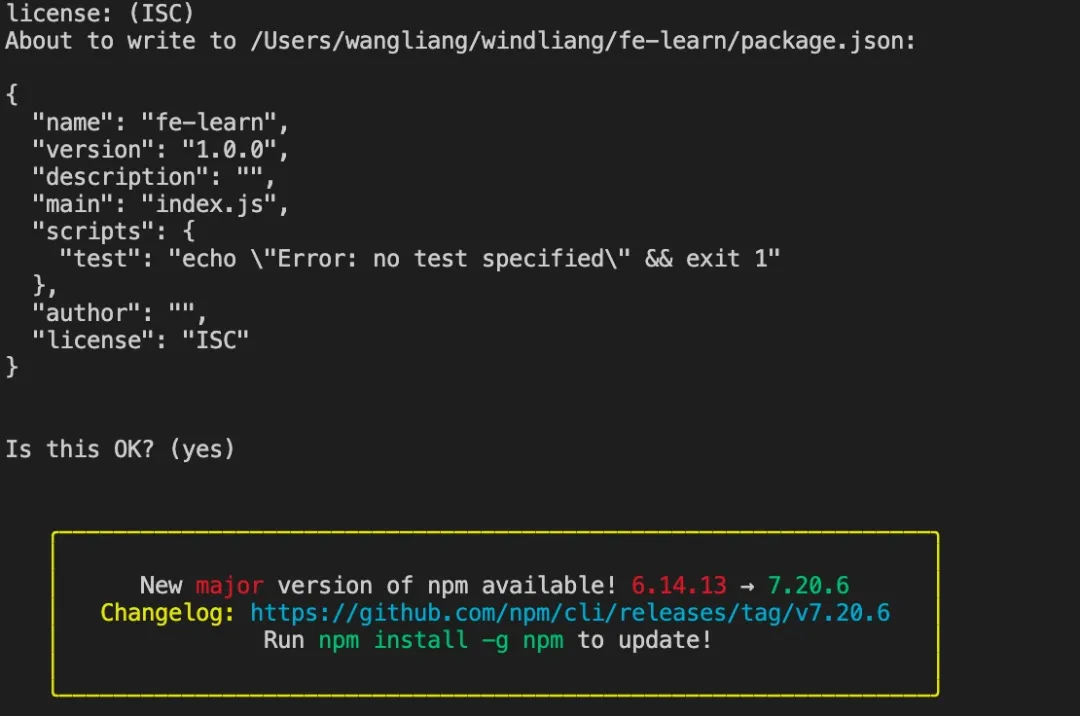
Create a new directory and run npm init to initialize a project.
npm init
and enter all the way back, it just generates the package.json file, which can be changed later if you want.
Webpack
The front end is constantly evolving, but many features are not always supported by browsers - ES6 modules, CommonJs modules, Scss/less, jsx, etc. With Webpack we can package all the files, compress and obfuscate them, and finally convert them to browser-aware code.
In addition to installing Webpack, we need to install the corresponding command line tool webpack-cli, as well as webpack-dev-server which implements hot-loading, i.e. automatically listens for changes to our files and then refreshes the page.
Since these tools are only used in the development phase, we can install them with the -D(–save-dev) command so that the development environment is not packaged.
npm i -D webpack webpack-cli webpack-dev-server
After installation, package.json will automatically record the node packages we have installed, and the corresponding versions are as follows, some configurations may be slightly different if the installation is different from mine.
{
  ...
  "devDependencies": {
    "webpack": "^5.51.1",
    "webpack-cli": "^4.8.0",
    "webpack-dev-server": "^4.0.0"
  }
}
Next, create a new webpack.config.js in the root directory to configure the project, mainly configuring the entry files, the package loss directory, and the devServer directory.
const path = require('path')
module.exports = {
  entry: './src/main.js',
  output: {
    path: path.resolve(__dirname, './dist'),
    filename: 'bundle.js'
  },
  devServer: {
    static: path.resolve(__dirname, './dist')
  }
}
Create the corresponding file above.
The main.js file mainly implements writing hello world in the web page.
// /src/main.js
document.write('hello world')
Create a new dist directory, create a new index.html file inside, and introduce <script src="bundle.js"></script>.
<!DOCTYPE html>
<html>
  <head>
    <meta charset="utf-8">
    <meta name="viewport" content="width=device-width,initial-scale=1.0">
    <title>front end app</title>
  </head>
  <body>
    <div id="app" />
    <script src="bundle.js"></script>
  </body>
</html>
Finally, create two new commands in package.json, the default test command can be deleted directly.
...
"scripts": {
    "dev": "webpack-dev-server --mode development --open",
    "build": "webpack --mode production"
},
...
Run npm run dev, which will automatically open http://localhost:8080/.

React
React allows us to focus on building the UI without having to manually maintain updates to the dom elements, and of course with VUE.
Install the core library react, and react-dom for rendering the web.
npm i react react-dom
Modify src/main.js to get a taste of it.
// /src/main.js
import React from 'react';
import ReactDOM from 'react-dom';

class Hello extends React.Component {
    render() {
        return React.createElement('div', null, `Hello ${this.props.toWhat}`);
    }
}

ReactDOM.render(
    React.createElement(Hello, { toWhat: 'World by React' }, null),
    document.getElementById('app')
);
npm run dev to see the effect.

CreateElement to create the element. If the page is complex, it would be too tedious to put one layer on top of the other.
Let’s rewrite it.
// /src/main.js
import React from 'react';
import ReactDOM from 'react-dom';

class Hello extends React.Component {
  render() {
    return <div>Hello {this.props.toWhat}</div>;
  }
}

ReactDOM.render(
  <Hello toWhat="World by jsx" />,
  document.getElementById('app')
);
But then you will find that the project does not run

Now, we need Babel.
Babel
babel converts syntax and new features into browser-aware js for us. Let’s start by installing babel and the babel-loader we use in webpack.
npm i -D @babel/core babel-loader
Then introduce babel-loader in webpack to convert the js and change the webpack.config.js file.
const path = require('path')
module.exports = {
  entry: './src/main.js',
  output: {
    path: path.resolve(__dirname, './dist'),
    filename: 'bundle.js'
  },
  module: {
    rules: [
      {
        test: /\.(js)x?$/,
        exclude: /node_modules/,
        use: {
          loader: 'babel-loader',
        },
      },
    ],
  },
  devServer: {
    static: path.resolve(__dirname, './dist')
  }
}
Then let’s install @babel/preset-react to convert the jsx syntax.
npm i -D @babel/preset-react
Create a new babel configuration file, babel.config.json, in the root directory.
// babel.config.json
{
    "presets": [
        "@babel/preset-react"
    ]
}
At this point, we can run npm run dev again and see that the project is up and running!
Then we can install some other babel to use the latest ES syntax, such as arrow functions, async await, question mark expressions, etc., and configure whatever we need. When the browser doesn’t support these features, babel can help us implement polyfill to downgrade.
@babel/preset-env contains many new ES features, and core-js implements ployfill, so with these two babel features you can use all the latest ES features with confidence, and if you don’t meet them we can configure the babel plugin separately.
npm i -D @babel/preset-env core-js
Then we’ll modify the babel configuration file.
// babel.config.json
{
    "presets": [
        [
            "@babel/preset-env",
            {
                "useBuiltIns": "usage",
                "corejs": 3
            }
        ],
        "@babel/preset-react"
    ],
    "plugins": [
    ]
}
where useBuiltIns": "usage" means that each file automatically determines whether ployfill is introduced, and corejs: 3 is the specified version.
TypeScript
More and more projects have introduced TypeScript, especially larger projects, through ts can make some bugs exposed in advance, usually their own development, you can also introduce ts to learn in advance.
There are two ways to introduce ts into a project.
Use TypeScript Compiler (TSC) to compile ts to ES5 so that it can run in the browser. And use TSC for type checking.
Use Babel to translate TS and use TSC for type checking.
In this case, we use the second approach, so that Babel and TSC can each do their job.
First install TypeScript and type for React.
npm i -D typescript @types/react @types/react-dom
Create a new tsconfig.json in the root directory for the ts configuration.
// tsconfig.json
{
    "compilerOptions": {
        "target": "es5",
        "module": "commonjs",
        "lib": [
            "dom"
        ],
        "jsx": "react",
        "noEmit": true,
        "sourceMap": true,
        /* Strict Type-Checking Options */
        "strict": true,
        "noImplicitAny": true,
        "strictNullChecks": true,
    },
    "include": [
        "src"
    ]
}
"noEmit": true, indicating that ts only does type checking and does not compile the output.
Then we modify src/main.js to src/main.tsx and add the type.
// /src/main.js
import * as React from 'react';
import * as ReactDOM from 'react-dom';

type Props = {
  toWhat: string;
};
type State = {

};

class Hello extends React.Component<Props, State>  {
  render() {
    return <div>Hello {this.props.toWhat}</div>;
  }
}

ReactDOM.render(
  <Hello toWhat="World by jsx" />,
  document.getElementById('app')
);
The next step is to configure babel, install @babel/preset-typescript, and convert our code from ts to js.
npm i -D @babel/preset-typescript
Add it to the babel configuration file.
// babel.config.json
{
    "presets": [
        "@babel/preset-typescript",
        [
            "@babel/preset-env",
            {
                "useBuiltIns": "usage",
                "corejs": 3
            }
        ],
        "@babel/preset-react"
    ],
    "plugins": [
    ]
}
Finally, add tsx to the path matched by babel in webpack.config.js.
const path = require('path')
module.exports = {
  entry: './src/main.tsx',
  output: {
    path: path.resolve(__dirname, './dist'),
    filename: 'bundle.js'
  },
  module: {
    rules: [
      {
        test: /\.(js|ts)x?$/,
        exclude: /node_modules/,
        use: {
          loader: 'babel-loader',
        },
      },
    ],
  },
  resolve: {
    // You can omit these suffixes when introducing modules
    extensions: ['.tsx', '.ts', '.jsx', '.js'],
  },
  devServer: {
    static: path.resolve(__dirname, './dist')
  }
}
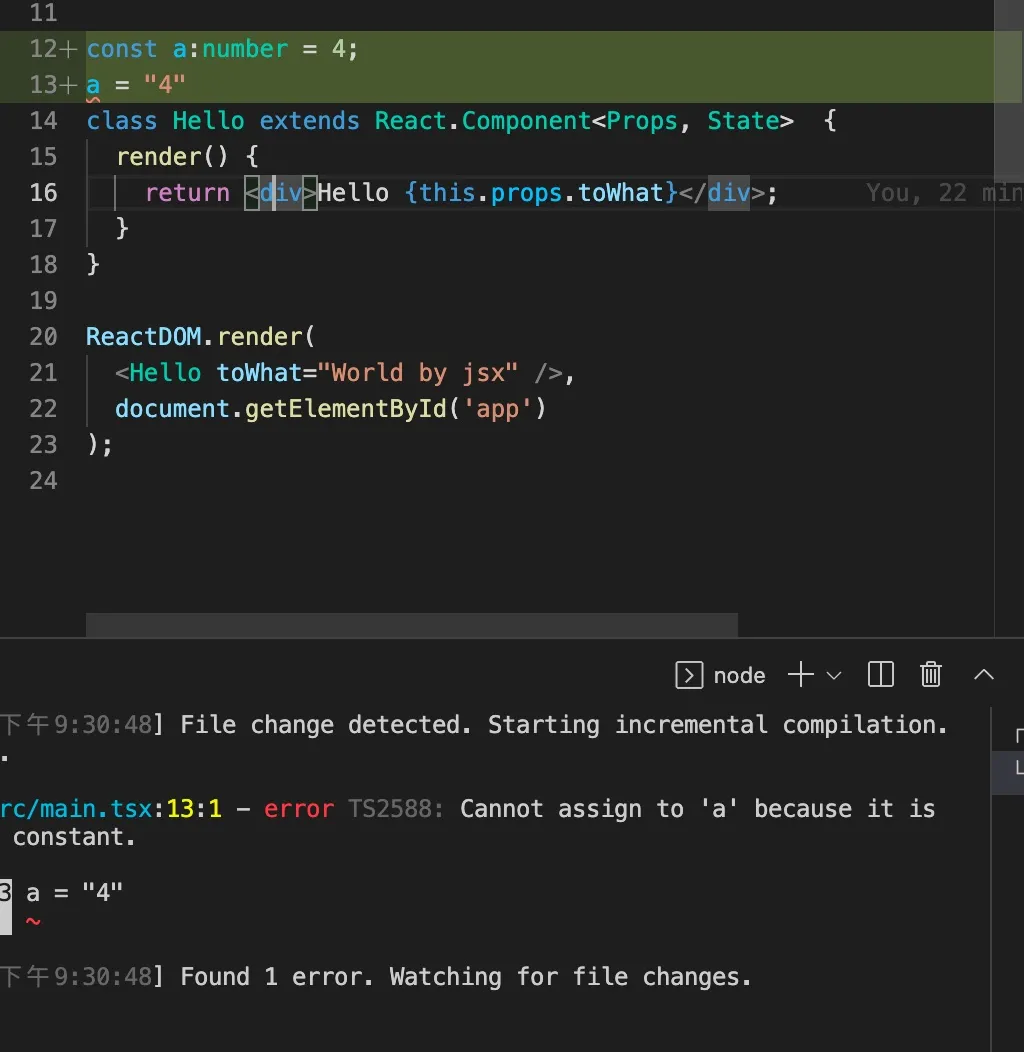
We can install typescript globally to facilitate type checking with the tsc command.
npm install -g typescript
You can run tsc -w to do type checking in real time.
Ant Design
Introduce component libraries for faster development.
npm install antd
By the way, you can extract the hello component from main.tsx and name it app.tsx as usual.
// /src/App.tsx
import * as React from 'react';
import { DatePicker } from 'antd';

type Props = {
    toWhat: string;
};
type State = {

};

class App extends React.Component<Props, State>  {
    render(): JSX.Element {
        return <div>
            Hello {this.props.toWhat}
            <div>
                <DatePicker></DatePicker>
            </div>
        </div>;
    }
}

export default App;
Then we introduce antd’s css file in main.tsx.
// /src/main.tsx
import * as React from 'react';
import * as ReactDOM from 'react-dom';
import 'antd/dist/antd.css';
import App from '. /App'

ReactDOM.render(
  <App toWhat="World by jsx" />,
  document.getElementById('app')
);
At this point, you need to install the css loader in the webpack.config.js configuration file, first.
npm i -D style-loader css-loader
css-loader allows us to introduce css in js, and style-loader helps us to insert css into the page as style tags.
Once installed, configure the loader.
const path = require('path')
module.exports = {
  entry: '. /src/main.tsx',
  output: {
    path: path.resolve(__dirname, '. /dist'),
    filename: 'bundle.js'
  },
  module: {
    rules: [
      {
        test: /\. (js|ts)x?$/,
        exclude: /node_modules/,
        use: {
          loader: 'babel-loader',
        },
      },
      {
        test: /\.css$/i,
        use: ["style-loader", "css-loader"],
      },
    ],
  },
  resolve: {
    // You can omit these suffixes when introducing modules
    extensions: ['.tsx', '.ts', '.jsx', '.js'],
  },
  devServer: {
    static: path.resolve(__dirname, '. /dist')
  }
}
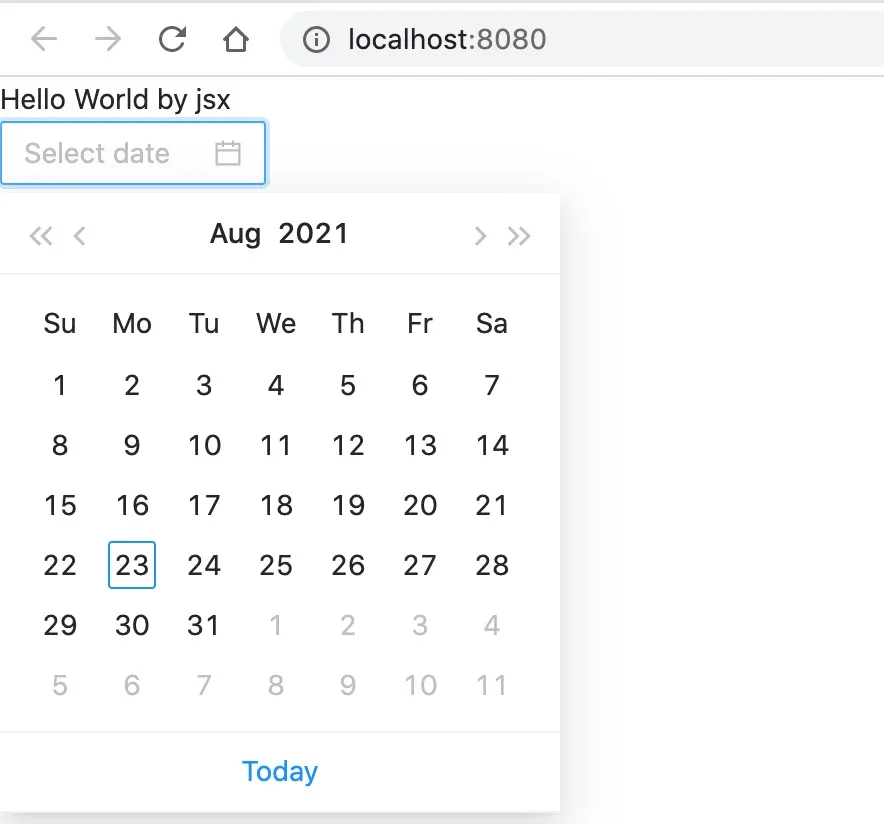
Then the date picker is successfully introduced.
Sass
Sass is a pre-compiler for css, which allows us to write styles more smoothly, specific features can refer to the official website, I use the most is to write css in nested form, very convenient.
Let’s install Sass and its loader.
npm install sass-loader sass --save-dev
Then configure it in webpack.config.js
const path = require('path');
module.exports = {
  entry: '. /src/main.tsx',
  output: {
    path: path.resolve(__dirname, '. /dist'),
    filename: 'bundle.js',
  },
  module: {
    rules: [
      {
        test: /\. (js|ts)x?$/,
        exclude: /node_modules/,
        use: {
          loader: 'babel-loader',
        },
      },
      {
        test: /\.css$/i,
        use: ['style-loader', 'css-loader'],
      },
      {
        test: /\.s[ac]ss$/i,
        use: [
          // Generate JS strings as style nodes
          'style-loader',
          // Convert CSS into a CommonJS module
          'css-loader',
          // Compile Sass into CSS
          'sass-loader',
        ],
      },
    ],
  },
  resolve: {
    // You can omit these suffixes when introducing modules
    extensions: ['.tsx', '.ts', '.jsx', '.js'],
  },
  devServer: {
    static: path.resolve(__dirname, '. /dist'),
  },
};
Add a few class names to App.jsx and introduce App.scss.
// /src/App.tsx
import * as React from 'react';
import { DatePicker } from 'antd';
import './App.scss';

type Props = {
  toWhat: string;
};
type State = {};

class App extends React.Component<Props, State> {
  render(): JSX.Element {
    return (
      <div className="app">
        <div className="text">Hello</div>
        <div>{this.props.toWhat}</div>
        <div>
          <DatePicker></DatePicker>
        </div>
      </div>
    );
  }
}

export default App;
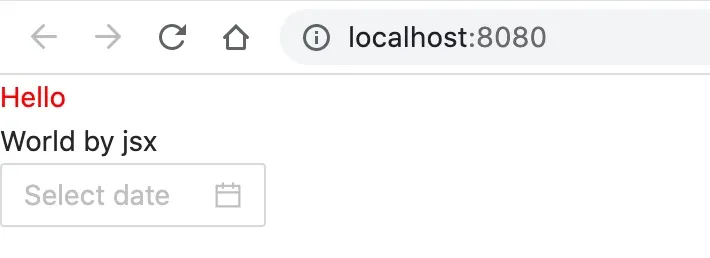
Create a new App.scss and add colors to experiment with it.
.app {
  .text {
    color: #f00;
  }
}
npm run dev to see the effect
Eslint
You can configure eslint to do static checks on syntax and also on ts.
npm i eslint -D
The npm i -g npx command can be installed globally to make it easier to run commands from the node_modules/.bin directory.
Otherwise, to run the eslint command, we need to run . /node_modules/.bin/eslint --version to get it. Or we can install typescript globally to execute the tsc command as above, or add a custom command to package.json. But npx is the most convenient.
Let’s initialize eslint.
npx eslint --init
and then select the options according to the project needs, and finally install the dependencies automatically.
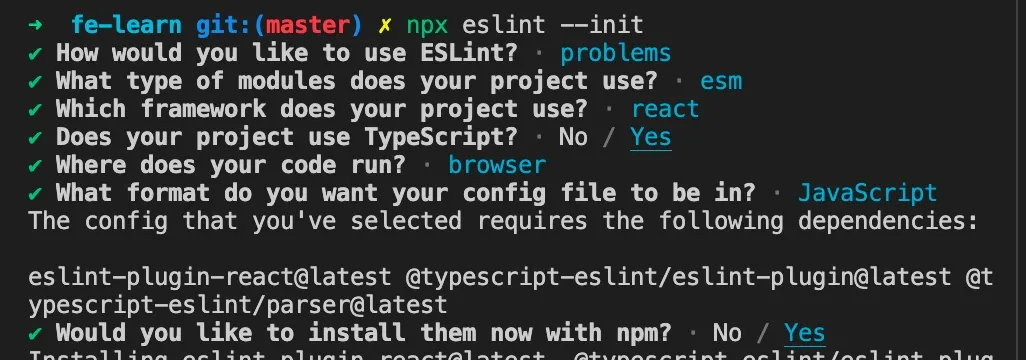
Then eslint automatically generates the .eslintrc.js configuration file for us, with a "node": true, otherwise module.exports would report an error.
module.exports = {
    "env": {
        "browser": true,
        "es2021": true,
          "node": true,
    },
    "extends": [
        "eslint:recommended",
        "plugin:react/recommended",
        "plugin:@typescript-eslint/recommended"
    ],
    "parser": "@typescript-eslint/parser",
    "parserOptions": {
        "ecmaFeatures": {
            "jsx": true
        },
        "ecmaVersion": 12,
        "sourceType": "module"
    },
    "plugins": [
        "react",
        "@typescript-eslint"
    ],
    "rules": {
    }
};
Then we can add a lint command to package.json to fix the code.
{
  "name": "fe-learn",
  "version": "1.0.0",
  "description": "web dev study",
  "main": "index.js",
  "scripts": {
    "dev": "webpack-dev-server --mode development --open",
    "build": "webpack --mode production",
    "lint": "eslint src --fix"
  },
  "author": "windliang",
  "license": "ISC",
  "devDependencies": {
    "@babel/core": "^7.15.0",
    "@babel/preset-env": "^7.15.0",
    "@babel/preset-react": "^7.14.5",
    "@babel/preset-typescript": "^7.15.0",
    "@types/react": "^17.0.19",
    "@types/react-dom": "^17.0.9",
    "@typescript-eslint/eslint-plugin": "^4.29.2",
    "@typescript-eslint/parser": "^4.29.2",
    "babel-loader": "^8.2.2",
    "core-js": "^3.16.2",
    "eslint": "^7.32.0",
    "eslint-plugin-react": "^7.24.0",
    "typescript": "^4.3.5",
    "webpack": "^5.51.1",
    "webpack-cli": "^4.8.0",
    "webpack-dev-server": "^4.0.0"
  },
  "dependencies": {
    "react": "^17.0.2",
    "react-dom": "^17.0.2"
  }
}
Then we can run npm run lint to fix eslint.
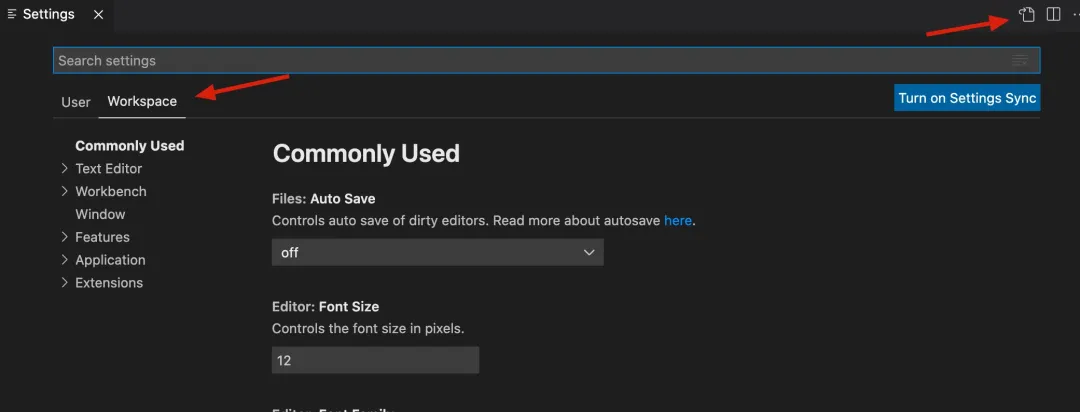
With Vscode we can also automatically detect eslint as we write and fix eslint related errors when we save.
You can install the Eslint plugin and add the following configuration to the vscode settings, which can be edited directly by clicking on the top right corner of the image below.
{
  "eslint.validate": ["javascript", "javascriptreact", "vue", "typescript", "typescriptreact"],
  "editor.codeActionsOnSave": {
    "source.fixAll.eslint": true
  },
}
To use a more complete eslint configuration, we can also directly refer to the Tencent Alloy team’s recommended configuration, see here.
Prettier
prettier is mainly used to check the style of the code, whether the string is double-quoted or single-quoted? How many spaces? Something like that.
Of course eslint can also be configured for this, but to separate their respective responsibilities, it’s best to use prettier to format the code style, so install it first.
npm i -D prettier
Then create a new configuration file .prettierrc.js, which directly references the Tencent Alloy team’s recommended configuration.
// .prettierrc.js
module.exports = {
  // max 120 characters per line
  printWidth: 120,
  // use 2 spaces for indentation
  tabWidth: 2,
  // use spaces instead of indentations
  useTabs: false,
  // semicolon at the end of the line
  semi: true,
  // use single quotes
  singleQuote: true,
  // object's key is quoted only when necessary
  quoteProps: 'as-needed',
  // use double quotes instead of single quotes in jsx
  jsxSingleQuote: false,
  // no comma at the end
  trailingComma: 'all',
  // spaces are required at the beginning and end of the braces
  bracketSpacing: true,
  // end tag of jsx need to wrap
  jsxBracketSameLine: false,
  // brackets are required for arrow function parameter, even when there is only one parameter
  arrowParens: 'always',
  // format the entire contents of the file
  rangeStart: 0,
  rangeEnd: Infinity,
  // no need to write the beginning @prettier of the file
  requirePragma: false,
  // No need to automatically insert @prettier at the beginning of the file
  insertPragma: false,
  // use default break criteria
  proseWrap: 'preserve',
  // decide whether to break the html according to the display style
  htmlWhitespaceSensitivity: 'css',
  // vue files script and style tags indentation
  vueIndentScriptAndStyle: false,
  // lf for newline
  endOfLine: 'lf',
  // formats quoted code embedded
  embeddedLanguageFormatting: 'auto',
};
Again, to automatically format the code for us when saving, we can install Vscode’s Prettier plugin and modify Vscode’s configuration again.
{
  "files.eol": "\n",
  "editor.tabSize": 2,
  "editor.formatOnSave": true,
  "editor.defaultFormatter": "esbenp.prettier-vscode",
  "eslint.validate": ["javascript", "javascriptreact", "vue", "typescript", "typescriptreact"],
  "editor.codeActionsOnSave": {
    "source.fixAll.eslint": true
  }
}
Summary
After going through the above series of operations, you can start to write the project happily.